e
1 Hour Design Challenge Deadline: Sunday Night!

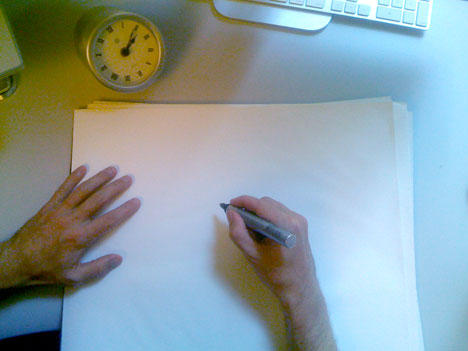
Background rendering by Coroflot member David Fearnley.
A quick post to let you know that this month's 1 Hour Design Challenge: Sick-Ass Car Renderings is coming to a close this Sunday night at 9pm PST.
There are some great entries so far, and we encourage all designers and students to enter!
CRITERIA: Judging will be based on quality of presentation and whether or not your work could have realistically been done in 1 Hour. The 1 hour does NOT include thinking in the shower, procrastinating, setting up the video camera, editing the video, uploading to Core77, or anything not related to creating the sick-assest rendering you can come up with. Use this Core77 4 minute sketch session as guidance for how to set-up your camera. If you're a digital hack, a screen capture will do nicely.
PRIZE: Publicity in the October Core77 Newsletter, publicity on the Core77 Blog, bragging rights that Ralph Gilles, VP of Design at Chrysler chose your design!
JURY: Guest judge on this 1HDC is Ralph Gilles, the VP of Design of Chrysler, and designer of the Chrysler 300. Community discussion is encouraged to help ensure the best design wins.
Important guidelines and entry link after the jump!
>>Submit your entry here!TWO IMPORTANT THINGS FOR THE SHOT: Things to consider when Making a 1HDC Time-Lapse Movie: 1. Make sure you have a good view of your drawing, occupying most of the frame (see image below). 2. You must have a clock or some other timepiece in the frame!
TWO IMPORTANT THINGS FOR TECHNOLOGY: Be sure your hard drive has enough space before starting! Your final movie file size will be large: up to 1GB or more depending on the camera you are using, so have at least that amount of free disk space.
Record a trial run first! Computers + cameras + 3rd party software = potential mess-ups. Make a few trial movies to be sure everything is working before you record your 60 minutes.
DELIVERABLES: Your entry should be comprised of 2 elements. A jpg image of your final rendering, and an embedded video of your Time-Lapse movie. You can use your favorite video sharing platform such as YouTube or Google Video or Blip or Vimeo. In the discussion forum, paste the name of your rendering, a sentence or two description if you'd like, the jpg image, and a link to your video. Easy!
Remember that movies must be submitted as *Time-Lapse* movies--ideally recorded at only a single frame per second. This means that your hour-long drawing will play in around two minutes, preventing the viewing audience from dozing-off during your show... DO NOT POST MOVIES THAT ARE 1 HOUR LONG!
Creating a Time-Lapse movie can be done by recording at normal speed and then time-compressing the footage in a video editing program such as AfterEffects. Another, more efficient way is to make your initial recording in time-lapse mode. It will keep your movie file size small and eliminate processing time. Some video cameras have this functionality built in, so be sure to check if your's does. But most likely you'll have to use a camera-to-computer connection (webcam or camcorder) and a time-lapse capture program. Two no-cost solutions are referenced below:
NOTE: A tablet sketch is acceptable - try to frame both monitor and tablet as closely as possible. A cintiq sketch is acceptable - point the camera at it as you would a normal sketch pad. In either case, a screen capture is acceptable but be sure it includes a *readable* clock or timer in the captured area.
FREE TIME LAPSE SOFTWARE AND TIPS Windows XP, Vista HandyAVI http://www.azcendant.com/download.htm (10 day free trial)
Can be used with an attached video camera or a webcam. We used it with a logitech quickcam and it worked great. If you have trouble check out the azcendant site for help.
Some quick instructions: Go to the "capture" menu and choose "time lapse". A new window pops up: Time-Lapse Capture. In this window: Choose your capture device. Select a location to save your movie. Leave compression alone. Choose to "Take one frame every 1.000 seconds". Playback rate should be "30." Click the "Start" button to start recording. When done, click Stop. Your movie is automatically saved.
Mac OSX SingleFramer http://www.versiontracker.com/dyn/moreinfo/macosx/28460 (Freeware)
Can be used with an attached video camera, a webcam, or a mac laptop's built-in isight camera. We used a Macbook Pro's isight.
Some quick instructions: Go to the "Watching" menu, choose "start watching." Go to "Movie Setup" menu, click "Start new DV movie." Enter a name for your movie in the dialog box which pops up. In the main window, next to the video feed, you will see a green "grab frame" circle - ignore it - to the right of it is the Time-Lapse Control. Choose "1" SECONDS between frames. Use the little green "start" button here to start recording. When done recording YOU MUST click the big pink "FINISH" button at the bottom to save your movie!
-
oFavorite This
-
QComment
Share your thoughts
Directory Company Profiles
Core77
Industrial Design
Resources
Industrial Design
Resources
-
Core77 Directory
Find the Best Industrial Design CompaniesGo -
Y Studios
Y Studios is an award-winning Industrial Design and Research consultancy in San Francisco with exten...
-
A2
A2 is a product development consultancy focused on design strategy, market and user research, indust...
-
Alternatives
We're a full-service branding and creative agency. We specialize in building brands, companies and o...
-
Bluemap Design
BlueMap design is a multi-disciplinary product development firm. Founded by Simon Yan in 2001, the f...
-
Open Design
We partner with teams to deliver fresh thinking and award winning products for passionate audiences....
-
Design Branch
DesignBranch is a full service industrial design firm. From helping inventors and startup companies...
-
James Owen Design
We've been creating brands, designing and developing new products, and destroying mediocrity for ove...
K
{Welcome
Create a Core77 Account
Already have an account? Sign In
By creating a Core77 account you confirm that you accept the Terms of Use
K
Reset Password
Please enter your email and we will send an email to reset your password.